 Loading... Please wait...


Recent Posts


- Home
- The Vape Mall Blog
- Mastering the Basics for the Way of the Coil
Mastering the Basics for the Way of the Coil
Posted by on
Building coils is not rocket science, but that doesn't mean just twist wire and throw it in a buddy's RDA and expect it to work right either. There’s a balance between experimentation and the uneducated guess to see what happens.
Which would you rather be?
The Basic Principles
There needs to be an understanding
of volts, watts, and ohms for this craft, and it isn't hard to gather
information on any of it. Spare yourself the frustration of trying to figure
out what went wrong. First, learn Ohms Law! Gain a firm understanding of
wattage and how ohms make the coil work.
The Right Tools
Tools are not hard to find and they
don't cost too much either. You can buy them separate, or you can go buy a kit
here at The Vape Mall, and conveniently enough, there is one called the coil
master! The basics are coiling tools ranging from 1mm to 3mm, pliers, nylon
tipped pliers or smooth jaw pliers, tweezers, ceramic tweezers, flush cutting
clippers, an ohm meter for testing, and if you plan to do the more difficult
builds like claptons or staples, you’ll need some kind of cordless drill and a
solid mounting clamp or vise.
Memory
A good understanding of the proper
process is also necessary. It isn't hard if you write it down until you
memorize it and follow the steps in the proper order. Protect your vaping reputation
by doing it the same way every time.
10 Steps:
- 1.Prep your materials and have your work space clean and organized.
- 2.Twist your coil.
- 3.Remove the battery from your MOD.
- 4.Mount it to the work piece.
- 5.Clip the leads.
- 6.Place battery in to the MOD.
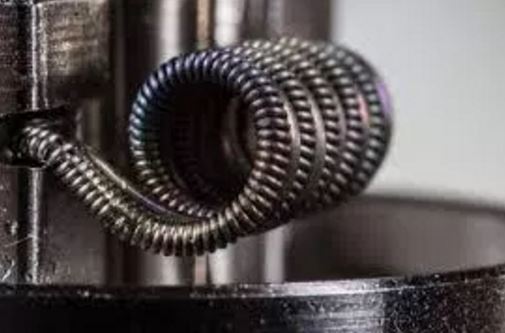
- 7.Gently pulse at a lower wattage. As you pulse, crimp the coil together with the ceramic tweezers to get the coils compressed together. Watch for hot spots and continue pulsing until the coil heats evenly from the center and let it cool. Make sure that your coil is adjusted for proper air flow and not going to short out on the cover.
- 8.Test it! Make sure that you understand that if you are doing a dual coil build and your single coil is at 1.0 ohms, the second coil will take it to .5 ohms.
- 9.Wick it.
- 10.Add e-juice.
The truth is, it takes time. The more you do, the more you’ll learn. Research will get you so far, but real experience can't be beat. So, you want to be a coil master?


