 Loading... Please wait...


Recent Posts


- Home
- The Vape Mall Blog
- Quick Step-by-Step Guide to Using the SMOK NFIX PRO Pod Kit
Quick Step-by-Step Guide to Using the SMOK NFIX PRO Pod Kit
Posted by on
 SMOKtech never fails to provide the vaping community
with impressive vape hardware, especially when it comes to their pod systems. Now, the latest and greatest device from this
awesome company is the SMOK NFIX PRO Pod Kit.
You’re looking at a pod mod that’s
packed with newly advanced functionalities, a user-friendly design, and neat
aesthetic appeal, all coming together to bring vapers that ideal pod-based
setup, capable of satisfying every vaping need.
SMOKtech never fails to provide the vaping community
with impressive vape hardware, especially when it comes to their pod systems. Now, the latest and greatest device from this
awesome company is the SMOK NFIX PRO Pod Kit.
You’re looking at a pod mod that’s
packed with newly advanced functionalities, a user-friendly design, and neat
aesthetic appeal, all coming together to bring vapers that ideal pod-based
setup, capable of satisfying every vaping need.
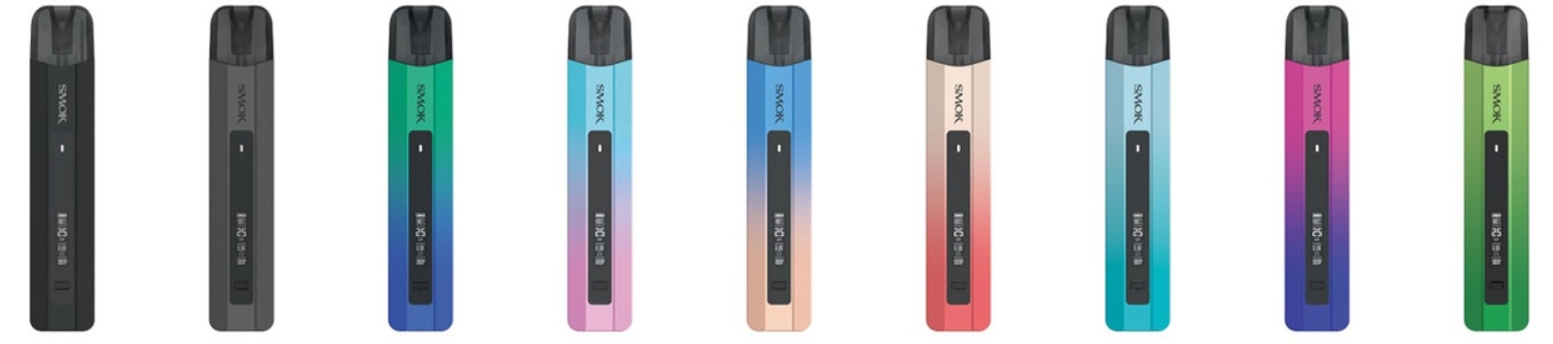
What is the SMOK NFIX PRO Pod Kit?
SMOK’s NFIX PRO Pod System contains an integrated 700mAh battery that allows the device to fire up to 25 watts. Plus, it uses a 2mL pod with the LP1 Coil Series (coils are installed in a press-fit manner) Constructed from durable zinc-alloy, the NFIX Pro Pod System adopts a pen-style form factor for easily traveling. Also, the SMOK NFIX Pro can operate via draw-activated firing mechanisms to deliver exquisite vapor and flavor that will delight the taste buds.
Let’s not forget, an LED Light Indicator allows you to see where your batter is at. This can be monitored on its 0.69" OLED Display Screen. Also has an array of safety protections.
Using the SMOK NFIX PRO Pod Kit: A Quick and Easy Guide
Below is the process of using the NFIX PRO to start getting the most out of its various capabilities within minutes of taking it straight outta the box.
Step #1: First, take the NFIX PRO and all the other contents out of the box. In the box you’ll find 1x NFIX Pro Pod, 1x 0.9ohm LP1 Meshed MTL Coil, 1x 1.2ohm LP1 Meshed MTL Coil, a Type-C Cable, and a User Manual
Step #2: Time to charge your device. Find the charging port, and then plug it into your USB cable. The unit charges within two hours, and once it reaches a full charge, the battery indicator will let you know.
Step #3: While the pod mod is charging, prepare your pod. To do so, you'll see a red silicone stopper on the side of the pod. Lift the stopper and fill the pod with the compatible e-liquid at. Wait several minutes or so before attaching it to the unit so that the liquid fully primes the coil.
Step #4: Now, you can attach the cartridge to the pod mod and turn the device on. Just take a draw and you’re all set.
Final Step: From here, you can take your first pull from the ergonomic mouthpiece and see how it feels in terms of short or longer pulls. Once you get the hang of using this device, check out its various functionalities that make it such an amazing pod-based system that can satisfy your many vaping preferences..


