 Loading... Please wait...


Recent Posts


- Home
- The Vape Mall Blog
- How to Prime SMOK Coils for Better Flavor and Longer Life
How to Prime SMOK Coils for Better Flavor and Longer Life
Posted by on
If you’ve ever experienced a burnt hit just moments after installing a brand-new SMOK coil, you’re not alone. One of the most common mistakes vapers make is failing to prime their coils properly. Whether you're using a TFV series tank, RPM device, or Nord pod system, properly preparing your coil before vaping can make a big difference in both flavor performance and coil longevity.
What Does It Mean to Prime a Coil?
Priming a coil is the process of saturating the cotton wick inside your coil head with vape juice before you start vaping. When you install a new SMOK coil, the cotton inside is completely dry. If you fire up your device before that cotton is properly soaked, you risk burning the wick, and once it’s burnt, there’s no going back.
Properly priming your coil ensures that the wick is fully saturated before it comes into contact with heat. This prevents dry hits, enhances flavor, and extends the life of your SMOK coil.
Why Priming SMOK Coils is So Important
SMOK coils, like most vape coils, contain organic cotton that absorbs e-liquid from the tank or pod and delivers it to the heating element. If the cotton isn’t saturated, your coil will heat up with no liquid to vaporize, leading to a burnt hit and often ruining the coil altogether.
Here’s why priming SMOK coils should be your standard practice:
- Prevents burnt hits from the first draw
- Enhances flavor right from the start
- Improves coil longevity, saving you money
- Allows better juice absorption, especially with high VG e-liquids
Step-by-Step: How to Prime SMOK Coils
Priming your coil only takes a few minutes and can save you the frustration of a ruined vaping session. Here’s the best way to do it:
1. Drip E-Liquid Directly Onto the Coil
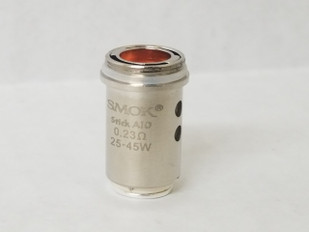
Before inserting the coil into your tank or pod, place a few drops of e-liquid directly onto the exposed cotton. On SMOK coils, you’ll usually see:
- A center hole at the top of the coil (where vapor flows through)
- Small juice holes around the side of the coil
Drip e-liquid into the top center opening and onto each of the side holes. Use about 4-6 drops total, depending on the coil size. For mesh coils with larger wicking ports (like the TFV16 or RPM 2), you may need a few more drops.
2. Assemble the Tank or Pod
Once the coil is saturated, install it into your SMOK tank or pod system. Make sure everything is screwed in or snapped together tightly to avoid leaks.
3. Fill the Tank or Pod and Let It Sit
After assembling your vape and filling the tank or pod with e-liquid, give it 5 to 10 minutes to rest. This waiting period allows the cotton to fully absorb the juice inside the tank, not just the initial priming drops.
Pro tip: This is a great time to check your device’s wattage settings and ensure you're within the recommended range printed on the coil itself.
4. Take a Few Primer Puffs Without Firing
Before hitting the fire button, take a few puffs without pressing any buttons. Just draw air through the mouthpiece to help pull more juice into the coil. This helps saturate the cotton even further and ensures you're ready to go.
5. Start at Lower Wattage
When you're ready to vape, start at the low end of the recommended wattage range for your SMOK coil. Take a few gentle puffs before gradually increasing to your preferred power setting. This break-in process protects the coil from early burnout and improves long-term performance.
Bonus Tips for Getting the Most Out of SMOK Coils
Proper priming is only part of the equation. To extend the life of your SMOK coils and keep your flavor fresh, try these additional tips:
- Avoid chain vaping: Rapid, repeated hits can overheat the coil and dry out the wick faster than it can re-saturate.
- Use high-quality e-liquid: Cheap or overly sweet juices can gunk up your SMOK coils faster.
- Keep your tank topped off: Running your tank low can expose parts of the wick to dry conditions, even during use.
- Clean your tank regularly: Old residue and leftover juice can affect new coils and cause premature clogging.
SMOK Coil Compatibility: Know Your Coil Type
Different SMOK devices use different coil families, so be sure you know which type you’re priming. For example:
- TFV8 / TFV12 Coils: Used in high-wattage SMOK tanks, often with large mesh or multi-core designs.
- RPM Coils: Found in RPM and RPM2 devices, with several resistances for MTL and DL vaping.
- Nord Coils: Used in Nord pod systems, including regular and mesh versions.
- LP1 and LP2 Coils: Compatible with the newer SMOK Novo and RPM lineups.
Each coil type will vary slightly in size and priming needs, but the steps above work for all of them.
Priming SMOK coils may seem like an extra step, but it’s essential if you want to enjoy smooth, flavorful hits and get the most from your device. A properly primed coil not only tastes better but can save you from tossing coils before their time.
Whether you’re using a Nord, RPM, or TFV tank, make coil priming part of your routine. Your taste buds, and your wallet, will thank you.
Looking for replacement SMOK coils? Stock up on authentic options to keep your vape running at peak performance. Choose the right coil for your device and make every puff count.


