 Loading... Please wait...


Recent Posts


- Home
- The Vape Mall Blog
- How to Fix a Broken RTA in 2024
How to Fix a Broken RTA in 2024
Posted by on
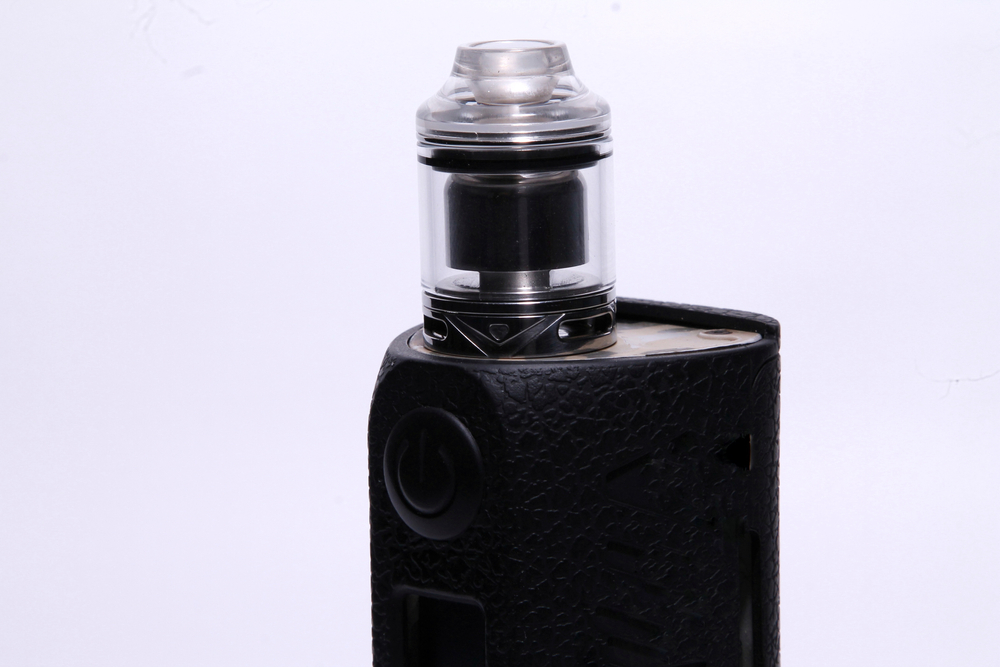 An RTA
(Rebuildable Tank Atomizer) is a type of atomizer that allows vapers
to build their own coils and wick, rather than purchasing pre-made coil heads. RTAs are known for providing a balance
between the convenience of a tank that holds a significant amount of e-liquid
and the customization and cost-efficiency of using rebuildable coils. Essentially, many enthusiasts enjoy RTAs for
the DIY aspect and the ability to tailor their overall vaping experience.
An RTA
(Rebuildable Tank Atomizer) is a type of atomizer that allows vapers
to build their own coils and wick, rather than purchasing pre-made coil heads. RTAs are known for providing a balance
between the convenience of a tank that holds a significant amount of e-liquid
and the customization and cost-efficiency of using rebuildable coils. Essentially, many enthusiasts enjoy RTAs for
the DIY aspect and the ability to tailor their overall vaping experience.
Now, building and wicking an RTA require some knowledge and experience because the performance can be greatly affected by the quality of the build. And so, fixing a broken rebuildable tank atomizer depends on the specific part that's damaged or malfunctioning. That’s why we are going to cover some general tips for common problems you might experience with your RTA.
How Can a Rebuildable Tank Atomizer Break?
Like any piece of equipment, RTAs can break or malfunction due to various reasons. Here are some of the common ways in which an RTA can break or face issues:
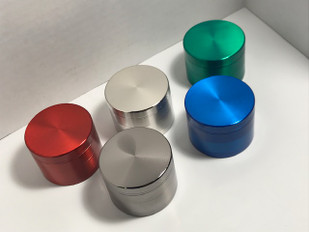
1.Glass Breakage: The tank section, often made of glass or sometimes plastic, is susceptible to breakage from drops or impacts.
2.Thread Wear: With frequent opening and closing, the threads on the base, chimney, or the top cap can wear out, causing poor sealing or difficulty in assembly.
3.O-Ring Damage: The O-rings provide a seal to prevent e-liquid leakage. They can wear out, get damaged, or degrade over time, leading to leaks.
4.Post Screws: The screws that hold the coil legs in place can strip or become loose, leading to unstable coil connections.
5.Insulator Damage: The insulators, usually made from PEEK or another heat-resistant material, can degrade or melt if the coil gets too hot. This can lead to shorts.
6.Airflow Issues: The airflow control mechanism can get jammed due to e-liquid residue or debris, leading to difficulty in adjusting airflow.
7.Coil Short Circuit: If a coil is improperly built or touches the inner walls of the RTA, it can cause a short circuit.
8.Wicking Problems: Improper wicking can cause issues such as dry hits, flooding, or e-liquid leakage.
9.Center Pin Issues: The adjustable or floating center pin can get pushed in, leading to connection problems with the mod.
10.Corrosion or Build-up: Over time, especially if not cleaned regularly, an RTA can develop corrosion or a buildup of e-liquid residue, affecting performance and flavor.
11.General Wear and Tear: Like any other product, over time, parts may degrade or wear out, impacting the overall performance and lifespan of the RTA.
12.Design Flaws: Some RTAs may have inherent design issues that can lead to frequent problems or premature failure.
How to Fix an RTA
Below is a general troubleshooting guide to help you identify and fix common issues with RTAs:
1.Leaking:
- Ensure all O-rings are in place and not damaged. Replace if necessary.
- Check that the coil is installed correctly and wicked properly. Too little cotton can lead to flooding and leaking.
- Ensure the tank is assembled correctly, with all parts fitting snugly.
- Make sure the fill cap or top cap is tightened properly.
2.Burnt Taste:
- Ensure your cotton is properly saturated before taking a hit.
- Check if the cotton is burnt and replace it if necessary.
- Ensure the coil isn't gunked up. Clean or replace the coil if it is.
- Check the wattage setting on your mod. It might be too high for the coil resistance you are using.
3.Poor Vapor Production:
- Ensure airflow holes are open and not blocked.
- Check that the coil is installed correctly and has the appropriate resistance.
- Make sure you're using a suitable power setting for the coil you're using.
4.Cannot Screw/Unscrew Parts:
- Be cautious when unscrewing to ensure you're turning the right component and not twisting the entire RTA apart.
- If a part is stuck, place the RTA in the freezer for about 10-20 minutes. The cold can cause the metal to contract slightly, making it easier to unscrew.
- Use rubber gloves or rubber bands for a better grip.
5.Broken Glass Tank:
- Carefully remove any remaining shards of glass.
- Clean the RTA thoroughly to ensure no glass fragments remain.
- Replace the glass tank. Many RTAs come with a spare glass or you can purchase replacements online or at vape shops.
6.Stripped Threads:
- If the threads on any part of your RTA are stripped, you'll need to replace that specific part. Threads are vital for ensuring a secure and leak-free connection.
7.Connector Pin Issues:
- Ensure the 510 connector pin (the pin at the bottom of the RTA that connects to the mod) is clean and free of debris.
- Some RTAs have adjustable 510 pins. If your RTA isn't making a proper connection with your mod, try adjusting it (if possible).
- If the pin is damaged, you might need a replacement.
8.Airflow Issues:
- Clean the airflow control ring and the air intake holes. Debris or gunk can accumulate over time.
- Ensure the internal airflow (from the coil to the mouthpiece) is not obstructed by misaligned parts or excess cotton.
Note: Always ensure that any fixes or replacements you make are compatible with your specific RTA model. If you're unsure about any step, it is best to consult the RTA's user manual or reach out to the manufacturer for assistance.
There is Hope Yet to Fixing Your RTA!
RTAs require more maintenance and understanding of Ohm’s Law and general electrical knowledge for safety. So, remember then, building and maintaining an RTA requires practice. As you gain more experience, it will then become simpler to troubleshoot and optimize your vaping sessions.
Again, to avoid these issues, it's essential to:
- Regularly maintain and clean your RTA.
- Be gentle when assembling or disassembling.
- Use the device as per the manufacturer's guidelines.
- Replace worn-out parts promptly.
- Always check for shorts or resistance fluctuations when installing new coils.


