- Home
- The Vape Mall Blog
- DIY ELiquid Safety and Preparation 101
DIY ELiquid Safety and Preparation 101
Posted by on
A big thing in the vaping world is customization. People love being able to customize their entire vaping experience and e-liquids are no different. A DIY e-liquid is one that you mix up yourself. This is great for making the liquid as strong or subtle as you want, as well as getting the exact flavor you want. This also gives you the freedom to experiment and see what you like best. With that being said, there are a few precautions and steps that need to be taken in order to stay safe and make your e-juice correctly.
Nicotine, E-Liquid, Flavoring
The first thing a vaper needs to do is make sure they have all the supplies before they begin.
- Diluted Nicotine: This is what puts the nicotine in your e-liquid. One thing to be aware of is that nicotine has its own taste so if you use a higher strength might alter the taste of your e-juice.
- PG or VG: Propylene Glycol (PG) doesn't usually alter the taste, but Vegetable Glycerin (VG) can make it taste sweeter. They have some differences so make sure you know which one is which, before adding.
- Flavor: You can use any flavor you want and mix them to try and get a great tasting e-liquid.
Supplies and Equipment
The next thing a vaper needs to do is make sure they have all the equipment
needed to start making your DIY e-liquid.
- Bottles: The best types of bottles are plastic drip tip bottles. Y ou want to make sure you have a few different bottles so you can keep the ingredients separated.
- Containers: These are great for preventing cross contamination. and keeping everything organized when making bigger batches.
- Syringes: These are one of the biggest pieces of equipment because you need to be able to get exact quantities. This is also helpful to make sure you get a consistent flavor each time.
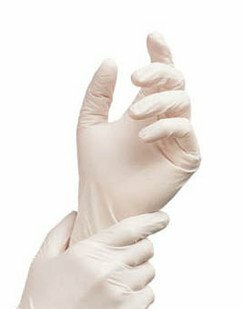
- Gloves: These are an important piece of equipment. Nicotine can be absorbed through your skin and you can have adverse effects. They also help keep things less messy and less likely to be spread around.
Steps for Doing it Right
and Safely
Now that we know what ingredients and equipment we need, we'll talk about the
steps in the actual process of making your own DIY e-liquid.
Step 1:
Nicotine Strength
The first step is to figure out what nicotine strength you're going to use.
- 1.Figure out how many milligrams of nicotine you need. The formula for that is: (Strength in mg/mL)(Volume in mL)= Amount of nicotine in mg. For example, say you want to make 80mL of 10mg/mL e-liquid. Your formula would look like this: 80X10=800. That means you need 800mgs for 80ml.
- 2.Next, you want to use this formula: (Amount needed)/(strength of the diluted nicotine)= Volume to use. So, say we have 50mg/mL of diluted nicotine. The equation would look like this: 800mg/(50mg/mL)= 16mL. This means we will need 16mL of diluted nicotine to make 80mL of e-liquid.
Step
2: Remove Nicotine from Container
Before doing this, make sure you put on gloves! Once you have your gloves on, you want to use
a clean syringe and pull out the needed amount. Sometimes getting the exact amount can be a little
difficult so the best way to do this is pull up a little bit more than what you
need then slowly push the excess back out until you reach the correct amount. Make sure you also get any air bubbles out
because this can throw off your measurements.
Step
3: Transfer Nicotine
Once you get the right amount measured out, put it into the container you are
going to use to mix everything up. Make
sure the container is clean so there isn't any cross contamination.
Step
4: Choose Your Flavors
This is the part where you decide which flavors you're going to use. Remember, when measuring the flavors, it is
recommended that you dilute it around 10%. So say you are making 50mL of
e-liquid, you only need 5mL of flavor. You
want to use a clean syringe to get the flavor out. It is the same process you
used to get the nicotine out. Once it's
measured, go ahead and add it to the container that has the nicotine.
Step
5: Add the PG or VG
The way you figure out how much of this to use is by adding together the amount
of nicotine and flavoring you already have. Once you do that, you take the number away
from the amount you want to make and then add the PG or VG to make the amount. For example, if you’re wanting to make 50mL of
liquid and you have 16mL of nicotine and 5mL of flavoring. This adds up to
21mLs. You would then subtract 21 from
50 which leaves you with 29mLs. T his is the amount of the PG or VG you are
going to add. Once you measure it, go
ahead, and then put it with the nicotine and flavoring.
Step
6: Cap and Shake
After everything is added, put the top on and shake it up really good. This helps ensure everything gets mixed all
together.
Step
7: Steep and Enjoy
The final step is steeping your juice. Once
you shake everything up, you should leave the cap off and let it air for a few
days. This will really bring the flavors
out. When done steeping, load it up into
your device’s tank or cartridge and start vaping away.
 Loading... Please wait...


