
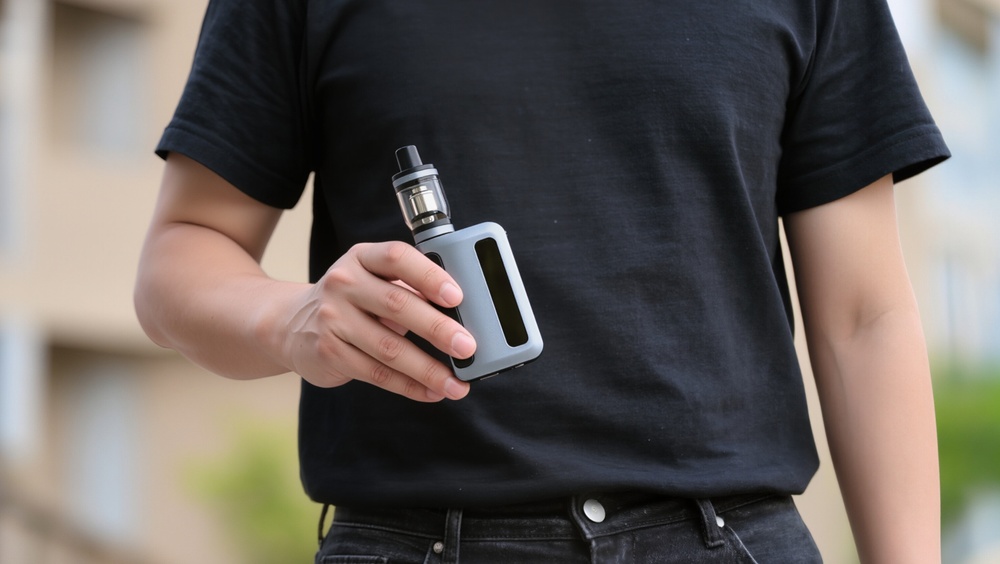
Exploring the newest crossovers in hardware design brings an incredible wave of versatility to your daily vaping experience. Modern setups beautifully blend the simple, drop-in nature of compact gear with the heavy performance of traditional configurations. This hybrid approach gives you access to rich flavor profiles and large liquid capacities without requiring a massive workspace to rebuild parts. While swapping your heating elements is a straightforward task, maintaining the underlying seals is what locks in that premium performance over the long haul. Pinpointing the exact condition of your internal gaskets guarantees a leak-free setup while extending the operational life of your hardware.
What is a Pod Tank?
To master your hardware maintenance, we need to draw a clear line between two terms that frequently get mixed up in casual conversation. A pod tank is a unique class of hardware that should never be confused with a basic, disposable pod cartridge. A standard cartridge is typically a tiny, thin plastic piece molded into a specific shape that only fits one low-powered pocket device, often locking the coil permanently inside its sealed body. A pod tank, however, takes the modular convenience of a plastic reservoir and pairs it with a heavy-duty, magnetic 510-threaded base adapter. This configuration means you can instantly snap the plastic housing out of its base to swap your heating elements, or leave the adapter attached to treat the entire assembly exactly like a traditional sub-ohm glass tank.
The physical construction of these units balances durability with lightweight portability. Manufacturers construct the upper reservoir out of high-impact food-grade polymers like PCTG plastic, which resists cracking from drop impacts and stands up against complex e-liquid flavor concentrates. These pieces come in various form factors, though a rounded cylindrical shape mimicking a traditional tank profile is the most common presentation on the market. Diameters typically land in the range of twenty-four to twenty-six millimeters, allowing them to sit flush on top of an array of power platforms. At the bottom of the plastic shell, strong neodymium magnets are pressed into the rim, locking the upper reservoir into a metallic base ring equipped with standard 510 threads.
Airflow delivery on these setups is remarkably open, offering a highly responsive draw that rivals any classic sub-ohm tank. Instead of forcing vapor through tiny air pathways like a miniature pocket device, a pod tank utilizes wide air intake slots machined straight into the metallic base adapter. This direct path feeds fresh air upward into the center of the specialized pod coils. These coils feature a plug-and-play design with thick rubber seals along the brass contact pins, slipping smoothly into the bottom of the polymer shell without requiring any special tools. The internal heating elements use advanced mesh wiring structures to maximize the surface contact with the cotton wick, resulting in rapid heat output and large, dense cloud production.
This structural versatility makes these hybrid units exceptionally compatible with high-output pod mods, a category that stands entirely separate from low-voltage open pod systems. An open pod system is built purely for stealth, utilizing ultra-low wattage to vaporize high-strength nicotine salts through tight, restrictive channels. A true pod mod is a high-powered device equipped with adjustable wattage chips and substantial battery capacities, designed specifically to push massive energy into sub-ohm resistance coils. Because the pod tank features that clever removable magnetic adapter, it bridges the gap perfectly, allowing you to use the exact same plastic reservoir directly on a dedicated pod mod or screw the complete 510 assembly onto a heavy-duty dual-battery box mod. This adaptability hands you full control over your power curves and cloud density.
The Other Components of a Pod Tank Being Those O-Rings
While the magnetic base and mesh sub-ohm coils handle the heavy lifting of vapor creation, the entire pressurized ecosystem relies heavily on a collection of tiny rubber loops known as O-rings. These miniature round gaskets are seated inside machined grooves throughout the inner architecture of the polymer chassis. You will locate them hugging the base of the plug-and-play coil housing, sealing the perimeter of the removable top cap or fill port plug, and lining the inner chimney pathway where vapor travels to the mouthpiece. Usually molded from synthetic compounds like high-grade silicone, nitrile rubber, or fluoropolymer elastomers, these rings are formulated to stay flexible while completely submerged in hot vegetable glycerin and aggressive flavoring extracts.
The central duty of these small rubber seals is to establish and protect a strict internal pressure balance inside the plastic reservoir. When you press a fresh coil into the bottom opening, the rubber rings compress against the inner walls of the plastic chamber, creating an absolute, liquid-tight blockade. This tight seal stops your e-liquid from seeping down into the electrical contacts of your power base, which could cause erratic resistance readings or ruin your device entirely. Additionally, these gaskets manage the air distribution within the tank. If an O-ring becomes warped or displaced, unwanted ambient air slips into the chamber, breaking the internal vacuum and causing the entire reservoir of juice to flood through the bottom air holes.
Timing When You Change the Pod Tank’s O-Rings
Managing the operational lifespan of your rubber seals requires balancing preventative care with a practical approach to hardware maintenance. Replacing your gaskets too late leads to sudden, messy leaks that can escape into expensive electronics, while swapping them out too early simply burns through your spare parts inventory for no performance gain. Recognizing the exact mechanical and visual indicators tells you precisely when to open up your spare parts kit.
Right Time to Change O-Rings
Paying close attention to the structural condition of your rubber gaskets prevents sudden leaks and keeps your flavor crisp. Inspecting these small rings during every coil replacement reveals clear physical indicators that confirm it is time to grab your spares:
- Visible cuts or flattened spots on the outer edge: Rough edges on a coil chimney can slice into the soft silicone during insertion, creating permanent channels where fluid escapes.
- The rubber material stretches out and slips from its seating groove: Repeated exposure to the heat of low-resistance sub-ohm coils relaxes the synthetic compounds, causing the loop to bunch up during assembly.
- A total loss of physical friction when inserting a new coil: If a plug-and-play heating element slips into the housing with zero effort or wobbles when seated, the matching gaskets have compressed permanently.
- Persistent liquid condensation gathering directly beneath the magnetic base: Finding a steady puddle of juice on your mod connection confirms that fluid is slipping past the lower barrier.
- The gasket turns hard and develops tiny cracks when compressed: Aging polymers lose their internal flexibility over months of use, converting a pliable seal into a brittle loop that cannot maintain pressure.
Wrong Time to Change O-Rings
Rushing to discard your rubber seals due to minor operational shifts can lead to a waste of your backup parts inventory. Many common tank anomalies can be resolved with simple adjustments or basic cleaning steps rather than a total hardware teardown:
- The airflow adjustment ring or top fill cap becomes unusually stiff to move: This resistance indicates a complete lack of surface lubrication rather than a damaged component, easily fixed by rubbing a drop of pure vegetable glycerin onto the track.
- A stubborn flavor note from a previous tank fill lingers in your fresh liquid: Porous synthetic compounds can temporarily absorb strong spice or mint notes, requiring a thorough wash in warm water instead of a complete component replacement.
- A small amount of vapor moisture gathers inside the metallic base adapter: High-output sub-ohm configurations naturally create normal condensation as warm vapor hits cold air intake walls, which is expected behavior that simply requires a quick paper towel wipe.
- The upper polymer reservoir wobbles slightly inside the magnetic ring: This movement is typically caused by a tiny piece of debris or lint resting on the magnets, which can be fixed by wiping the contact surface clean.
- Adhering to a strict calendar schedule that demands fresh parts every few weeks: High-quality silicone and nitrile seals are engineered to survive months of daily operation, making routine swaps a waste of good supplies if the rubber passes a basic visual check.
Mastering Your Pod-Based Vaping Routine
Embracing the smart architecture of a modular pod tank hands you the ideal combination of effortless maintenance and robust sub-ohm power. Keeping a watchful eye on those internal rubber seals preserves the vital pressure vacuum that prevents messy leaks and keeps your flavor running beautifully. Making your maintenance decisions based on real physical wear rather than guesswork saves your spare parts while safeguarding your favorite pod mods. Directing a small amount of attention toward proper lubrication secures a reliable, high-density session every single time you snap the reservoir into place.
Leave a Reply